Before you start
Hosting is an infrastructure operations commitment. A machine that passes a benchmark once but cannot remain cool, powered, connected, and driver-stable will cause failed workspaces and lost renter work. Start with one well-understood node, validate the renter experience, then expand.
| Area | Practical requirement |
|---|---|
| Operating system | Server-oriented Linux with root or sudo access. See the recommended Linux releases. Recognition of a package manager alone does not establish a tested configuration. |
| Network | Outbound HTTPS to the ComputeCubed API and required image registries (including registry.computecubed.com for runtime images), plus outbound WireGuard UDP to the assigned gateway. No provider-side public IP or inbound port forwarding. |
| NVIDIA | The host driver is installed and nvidia-smi reports every intended GPU before joining. |
| AMD | GPUs are bound to amdgpu, /dev/kfd exists, and the host is suitable for ROCm workloads. |
| Storage | Reliable SSD/NVMe capacity for the node agent, images, workspace disks, and the capacity you intend to advertise. |
| Operations | Stable power, cooling, clocking, firmware, time synchronization, and a deliberate update policy. |
Recommended Linux distributions
Ubuntu Server 22.04 LTS and 24.04 LTS are recommended starting points. Additional distribution results will be listed here after onboarding and rejoin validation is complete.
This list concerns the operating system on your provider machine. Rental workspace images are selected separately. NVIDIA results do not establish AMD/ROCm compatibility on the same releases. Use a host driver appropriate to your GPU and kernel, and verify it before joining; the join flow prepares the node runtime and container GPU tooling. The join flow also verifies the kernel netfilter capabilities Kubernetes networking needs and, on RHEL-compatible minimal installations, installs the distribution's kernel-modules-extra package for the running kernel when required; it never replaces or upgrades your kernel.
Prepare and verify Linux
- 01
Update deliberately
Apply OS, firmware, and driver updates before listing. Reboot and verify the final kernel/driver pair. Disable unattended changes that could restart services or replace GPU drivers during a rental. - 02
Verify accelerators
Runnvidia-smion NVIDIA systems. On AMD, confirm theamdgpubinding and/dev/kfd. A node cannot join a cluster whose declared GPU family conflicts with detected hardware. - 03
Check resources
Confirm CPU thread count, usable RAM, free disk, GPU count and VRAM, PCIe link width, network throughput, and sustained thermals. These values become visible evidence in the marketplace. - 04
Plan data handling
Use dedicated rental storage where practical. Do not store provider secrets on tenant-accessible paths. Treat renter data as private and do not inspect or reuse it.
# NVIDIA baseline
nvidia-smi

# AMD baseline
lspci -nnk | grep -A3 -E 'VGA|Display|3D'
test -e /dev/kfd && echo "ROCm device interface present"

# General capacity checks
lscpu
free -h
df -h
Create the cluster
Open Clusters in the Console and choose Create Cluster. Give it a name that helps you operate it without exposing a renter or location secret. Select None, NVIDIA, or AMD. This family is a compatibility boundary: all accelerator nodes in the cluster must match it.
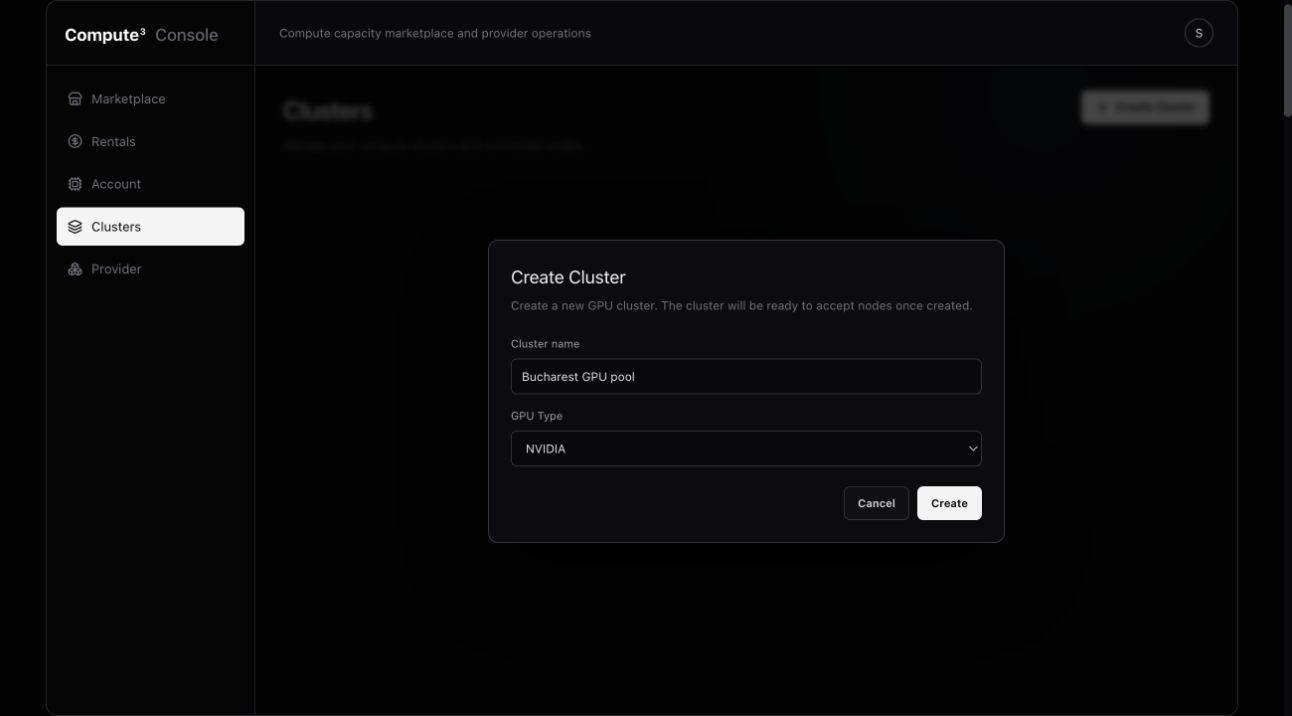
The cluster first shows creating while its managed controller is prepared. Wait for ready before adding nodes. The Activity Monitor shows milestones such as Cluster Created, Controller Started, Controller Joined WireGuard, Controller Ready, and Cluster Provisioned. If provisioning reports error, preserve the last error and contact support rather than repeatedly deleting and recreating the cluster.
You can have one cluster without joined nodes for each accelerator family. If an empty NVIDIA, AMD, or None cluster already exists, the Console links you to it instead of creating another one of that family. Add a node to that cluster or delete it before creating a replacement.
An empty cluster is automatically stopped after 24 hours. The 24-hour period restarts when the last joined node is removed; a temporarily disconnected node remains attached and does not restart it. ComputeCubed emails you when the cluster is stopped. Open its detail page and choose Start Cluster before generating a new join command or attaching a node.
Join a node
- 01
Generate one command
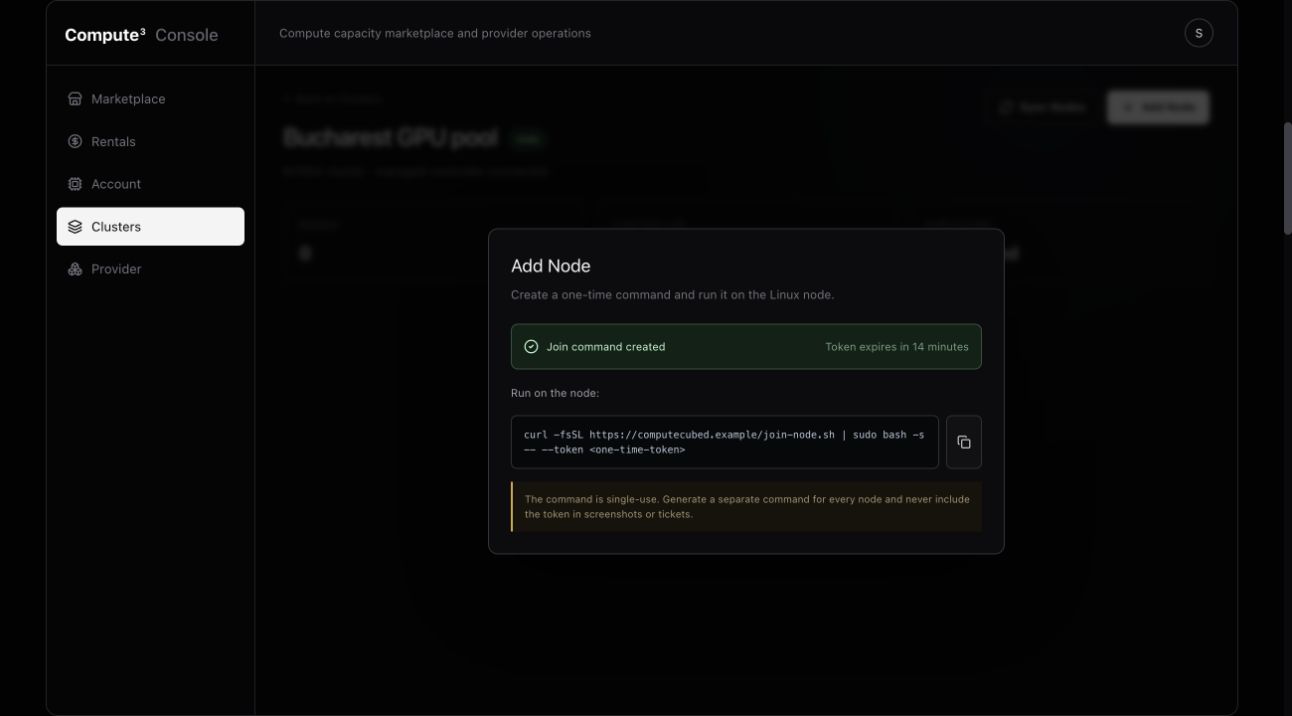
Open the ready cluster, select Add Node, then Create Join Command. The command contains a short-lived, single-use bootstrap token. Create a fresh command for every machine. - 02
Run it as root
Copy the standard command to the target Linux host. Use the expanded no-curl form only when curl is unavailable. Read the command before execution and run it directly in a root shell or through sudo. - 03
Watch the transcript
The script checks the cluster’s hardware family, installs basic dependencies when necessary, establishes the private tunnel, joins the node agent, and retries the final inventory registration. It reports completion only after registration succeeds; otherwise it exits with an error while preserving the joined services for a safe retry. - 04
Watch the Console
The node can appear before it is rentable. Its lifecycle advances through connectivity, inventory, benchmarking, and ready. The Console receives live events, but a manual Sync Nodes is available for reconciliation.
[ComputeCubed] Starting join for node 'gpu-worker-01'.
[ComputeCubed] WireGuard, curl, and python3 are already installed.
[ComputeCubed] Fetching cluster-specific node requirements.
[ComputeCubed] Cluster GPU type requirement: nvidia.
[ComputeCubed] Node preflight checks passed.
[ComputeCubed] WireGuard userspace tools are ready.
[ComputeCubed] Generating fresh local WireGuard keypair. The private key stays on this node.
[ComputeCubed] Exchanging bootstrap token for WireGuard peer settings.
[ComputeCubed] WireGuard peer allocated: 10.90.0.14.
[ComputeCubed] Starting WireGuard interface ccwg0.
[ComputeCubed] Waiting for controller connectivity through WireGuard.
[ComputeCubed] Controller is reachable.
[ComputeCubed] Running k3s agent join command.
[ComputeCubed] k3s join command completed.
[ComputeCubed] k3s node registration confirmed.
[ComputeCubed] Registering node inventory with ComputeCubed.
[ComputeCubed] Node registration completed.
[ComputeCubed] Bootstrap complete.When moving a previously joined machine to a new cluster, finish its rentals and remove the old cluster first. Generate a fresh join command from the new ready cluster and run it on the same machine. The standard command handles stale ComputeCubed agent and tunnel state; a previously installed agent alone does not require reinstalling Linux. Follow the new node through validation before listing it again.
Inventory, validation, and benchmarks
After Kubernetes reports the node ready, ComputeCubed collects a hardware inventory and schedules platform benchmarks. The public listing can expose CPU model and cores, RAM, disk, GPU vendor/model/count/VRAM, driver and CUDA or ROCm details, PCIe characteristics, download/upload performance, cluster-network metrics, disk throughput, GPU performance, model-serving performance, and uptime windows.
The node summary keeps operational health, rental status, and listing settings separate:
| Summary | What to verify |
|---|---|
| Operational health | Ready means the node meets readiness requirements. Disconnected remains visible without expanding details. |
| Rental | An existing rental can remain reserved while interrupted. Billing paused identifies a detected service outage. |
| Listing | Listed describes the enabled listing; Listing enabled — unavailable identifies an enabled listing on a node that is not ready. |
| Uptime | Incomplete windows show Insufficient history. Use Since tracking began for the observed history of a new node. |
Confirm completed inventory and benchmark milestones before listing a newly joined node.
A warning is not cosmetic. Investigate reduced PCIe width, unexpected GPU count, weak disk writes, low network throughput, thermal throttling, missing software versions, or a hardware report that differs from the machine you intended to list. Only a ready node with current reports is eligible to publish.
Next: publish deliberately
Before listing, rent the machine as a normal renter would: compare its marketplace card, launch an allowed mode, establish WireGuard, test SSH or kubectl, exercise the GPU, tunnel any advertised service, end the rental, and check the ledger. Then continue to Listings and pricing.